03 December 2012

Pretty In Pink

A friend of mine saw a monogrammed clutch online and asked me if I could create one as a birthday gift for her friend. The friend is a member of Alpha Kappa Alpha Sorority so of course the clutch would be pink & green. She initially requested a green one with pink embroidery as I have this green one listed for sale in my Etsy shop.

I didn't have any more of the green vinyl on hand and would have to order online. But I happened to see some pink vinyl in Joann so we went with that.

24 September 2012

Who's Drafting Patterns These Days?

*sigh* So...Simplicity recently released their Winter/Holiday 2012 patterns. They should have just not bothered.

McCall's also released their Winter/Holiday collection. There are a couple of blouse patterns that I found cute.
6659 has 4 different versions. I like 3 of them.

17 September 2012

Lace Overlay Dress + Pattern Review


I apologize in advance; this post is going to be quite lengthy.

So I needed a dress for a special service at church and I have been coveting lace overlay dresses for a while now. I really wanted to have scalloped edges on the hem and sleeves but wasn't sure if I knew how to pull it off. I found this post on Gertie's New Blog for Better Sewing and that was all the info I needed for how to pull off the scalloped edges.

09 August 2012

What's On Deck: New Look 6123

So I realize that I've totally been neglecting my blog. I don't have a lot of readers but the fact that I don't post much probably has a LITTLE bit to do with it. So I'm trying to commit to posting even if I don't have a completed project.

I am currently working on New Look 6123 View D. I've done some improvising because the pattern doesn't call for the dress to be lined. And I just think a lining is better than facings. So far I've put a few miles on my thinking cap because of the unique design of the sleeves. But I think I have it all worked out. I'm pretty proud of myself.

04 July 2012

A Present For Me!

When I got married, my darling husband came with a collection of some 84 pocket handkerchiefs (yes I counted).  The picture below is how I organized them using a hanging jewelry bag. He brought them just thrown into some sort of basket. That system was SO not gonna work for me....

Christmas in July?

Last year I wanted a red suit to wear to church on Christmas morning but I couldn't find just the right shade that I wanted so I decided to make something. Since I'd waited until the 11th hour (and I NEVER do that) it needed to be something fairly simple. This dress was perfect because it didn't have that many pattern pieces.  I did finish it in time and wore it Christmas morning. Unfortunately my beloved husband is not the most attentive photographer and I didn't want to use the picture he took. I wore it again recently so I finally have a pic for the blog.


28 May 2012

Pattern Review: Vogue 8574

I made this maxi dress last summer. I've worn it a handful of times but never think to take a picture while wearing it so I never blogged it until now. I wore it to my daughter's high school graduation yesterday so finally a kodak moment...

ummmm.... please excuse my do. the graduation ceremony was outside and it was quite windy so by the end of the day my hair was a hot mess!

17 April 2012

Pattern Review: The Emily Bag - My "Grown Woman" Bag


My friend Jabree told me that every grown woman should have a "church bag" to carry all your stuff in. I had sketched one out I was going to make but I came across this pattern and really love the shape of the bag and it's a good size too.  Here's my review...

The pattern is #108 - The Emily Bag from http://www.ithinksew.com/

Pattern Description:

The huge size of The Emily Bag follows the style of big modern bags, providing the carrier with a vast amount of space in which to carry a range of items, from small to bulky. The Emily Bag is sure to be a hit at the beach and during the sunnier seasons.

Pattern Sizing:

Finished Size: 18” WIDTH X 14 ¼” HEIGHT X 7” STRAP HEIGHT X 7” DEPTH

12 ½” WIDTH X 6 ½” HEIGHT (BOTTOM)

Did it look like the photo/drawing on the pattern envelope once you were done sewing with it? Yes

Were the instructions easy to follow?

The instructions are very well illustrated with photos for every step. . I tried to follow the instructions pretty closely so I could give a proper review but some things I just could not bring myself to do. For example, it tells you to pin the pocket lining to the zipper and bag lining and then flip it over and stitch - essentially instructing you to sew blindly over pins. I just wouldn't do that and risk damaging my machine. Instead I pinned from the back (because you really needed to) and then put pins in the front and removed the ones from the back before stitching. This was the one thing that caused me to raise a brow but most people will develop their own techniques for inserting zippers/pockets anyways.

The only other thing was that no pattern pieces were provided for the bag bottom and the handles which I'm perfectly fine with. However, I just happened to notice some extra dimensions on one of the pattern pieces. You basically have to figure it out on your own because it's not mentioned in the instructions that you need to cut these pieces.

There were a few places where the instructions weren't altogether clear but the saving grace is the illustrations. So between the instructions and the photos you can figure out what you're supposed to do.

What did you particularly like or dislike about the pattern?

I LOVE the shape of the bag and that it's large enough to be used as a tote - and not your grandmother's typical rectangular quilted tote.

I appreciated that a separate pattern piece was provided for the lining. Often you use the same piece for the outside and the lining. If the bag has pleating you're doing double the work to make pleats on the inside which won't be seen and it can be difficult to place pockets over the pleats.

This was my first attempt at (1) zippered pocket and (2) square bottomed bag. Usually the bags I make have gussets so it was good to try something new.

Fabric Used:

Home Dec canvas from JoAnn. I had initially purchased it to make a tote for church using a design that I sketched out but decided to use this pattern instead. I had to be very creative to get all of my pattern pieces out of the fabric I had but I just made it.

Pattern alterations or any design changes you made:

The pattern calls for a single pocket on one side of the lining. I added pockets on the other side of the lining. I did a double layer of pockets with sections in the top layer. I also added my initials to the inside of the bag. In hindsight I would have done the embroidery directly to the bag lining instead of on the pocket. However I'd already inserted the magnetic snap and didn't want to put that in my hoop nor did I want to remove it and risk weakening the prongs.

I interfaced the bag and the lining with fusible woven interfacing. The pattern only called for the lining to be interfaced as an OPTIONAL step.

I had intended to reinforce the bottom of the bag but I had already closed up the lining before I remembered.

Would you sew it again? Would you recommend it to others?
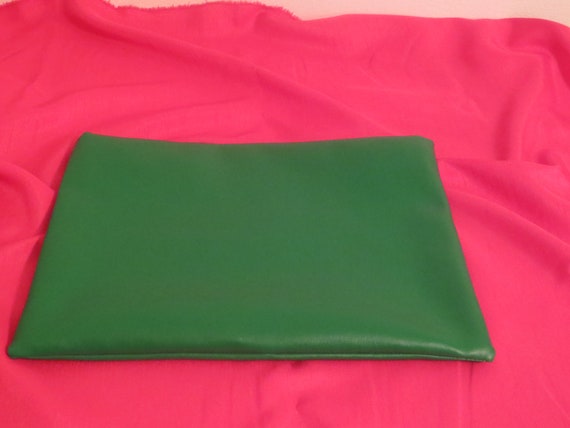
I might sew it again. I have some black faux leather fabric I've been wanting to make a purse from.

Pics:


My "church stuff" 
 My initials embroidered on one of the pocket layers.


30 January 2012

Pattern Review: B5682 - First pair of jeans

Let me first say this was my very first pair of jeans/pants I've ever made so I'm happy to have completed them. 


Pattern Description: MISSES' JEANS AND TROUSERS: At waist, fitted jeans (A,B,C,D) and semi fitted trouser (E), have contoured waistband and fly zipper. A: Slim leg, ankle length. B: Straight leg. C: Boot cut. D: Flared leg. E: Straight leg, hook and eye closure. I made the trousers

Pattern Sizing:6-14.  I cut the 14 but I could have gone down to a 12 as I have a bit of sagginess in the hips & bootay.

Did it look like the photo/drawing on the pattern envelope once you were done sewing with it?Pretty close for the most part.

Were the instructions easy to follow?There's really not a whole lot of pattern pieces so it seemed it would be pretty straight forward. However I was SUPER CONFUSED on the instructions for inserting the fly zipper. I couldn't make any sense whatsoever out of what they were asking me to do. I just left it sit on the table in the craftroom for about a week. Every day I'd walk in there and look at the instructions, look at my fabric and turn the light off and walk out. LOL! Via the message board on here I found a tutorial and a video which SOMEWHAT helped. But given that my pattern pieces were not shaped the same as the pattern pieces in the tuts, I still had to fudge it a little bit. But it WAS enough to get me passed that step. But my fly zipper didn't look very "fly" - meaning the zipper was just barely covered. Once I got beyond that, the rest went relatively smoothly.

What did you particularly like or dislike about the pattern?I loved that I could potentially get so many cuts of jeans from one pattern.
After having consulting some tutorials, I didn't really like the shape of the fly part. I wish it was all one piece and the same shape on both sides. Not sure if any such pattern exists but I will be on the hunt for one. Also the little piece that covers the zipper was not as long as it is in ready-to-wear jeans.

Fabric Used:Denim I caught on clearance from fabric mart for $1.19/yard. For the pocket linings I used cotton scraps leftover from making a purse.

Pattern alterations or any design changes you made:As this was my first pair of pants/jeans I've ever made, I didn't want to make any alterations to the pattern. I considered adding a couple of inches as I prefer a 33-inch inseam when I wear heels but I can wear this version with flats.

Would you sew it again? Would you recommend it to others?I don't know that I would sew these again. Maybe with a bit more experience I would be able to make this pattern work for me. But as for now, the fly zipper part is a bit confusing. I don't know that I would recommend this to beginners as their first pair of pants.

Conclusion: I wanted a great pair of trouser jeans and I think I'm STILL on the hunt for a great pattern. I'm calling these a wearable muslin. They need a bit of fitting but at less than $5 for the project, I'm not upset if I don't work out all the bugs on this one. I will be attempting to do some fitting in the butt/hips. Here are pics of how they fit as of now.


Theme created by PIXEL HAZE DESIGNS